Duane Michals–Wow!

‘A Master of Photographic Narrative’

A new (for me) discovery – Duane Michals. His sense of social perception is powerful. His pictures are full of emotion, full of energy, full of varied view points. This isn’t about the visual – it’s about the message, the thoughts it provokes. Much of what I’ve been trying to push toward. It’s hard to see that though all of the glossy, technically perfect stuff that is out there now. I feel this in my gut – I hoped it could be out there. And he’s done it. So that gives me hope that I can too. It takes vision, guts and the sweat.

There is nudity in this video and some slightly disturbing concepts. Don’t watch it unless your good with that.

Series of his work:


An interview (very long and stuffy, but good):

Photoshop Free Transform

After too many years of bad software help files I’ve stopped believing that there is anything helpful behind the help button. Instead I buy the book and think that is better.

Photoshop is changing that. There are so many Photoshop books out there its easy to forget that the program comes with help. And its good stuff. Even more important it is a base level of information that the books skip. Sure they show you how to change images from this to that. They tell you what buttons to push, but they don’t put them in context. So I can use a command for that one thing, but I’m missing out on all the variations of the tool.

Until I push the help button. For free…

I pulled the following from the Photoshop help on Free Transform and added examples.

 Free Transform

The Free Transform command lets you apply transformations (rotate, scale, skew, distort, and perspective) in one continuous operation. You can also apply a warp transformation. Instead of choosing different commands, you simply hold down a key on your keyboard to switch between transformation types.
Note: If you are transforming a shape or entire path, the Transform command becomes the Transform Path command. If you are transforming multiple path segments (but not the entire path), the Transform command becomes the Transform Points command.

Select what you want to transform.

Choose Edit > Free Transform.

To Scale by dragging, drag a handle. Press Shift as you drag a corner handle to scale proportionately.
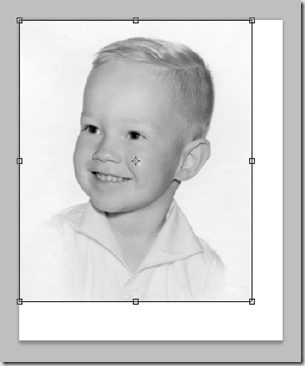
image

To Rotate by dragging, move the pointer outside the bounding border (it becomes a curved, two-sided arrow), and then drag. Press Shift to constrain the rotation to 15° increments.

image

To Distort Relative to the center point of the bounding border, press Alt (Windows) or Option (Mac OS), and drag a handle.
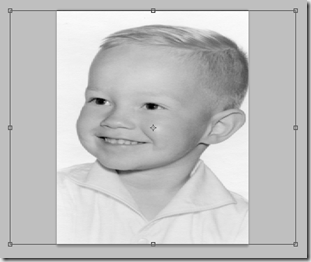
image

To Distort Freely, press Ctrl (Windows) or Command (Mac OS), and drag a handle.

image

To Skew, press Ctrl+Shift (Windows) or Command+Shift (Mac OS), and drag a side handle. When positioned over a side handle, the pointer becomes a white arrowhead with a small double arrow.
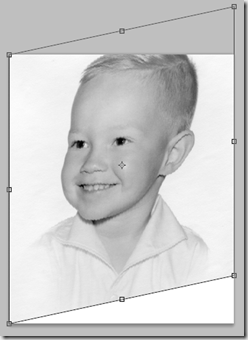
image

To Apply Perspective, press Ctrl+Alt+Shift (Windows) or Command+Option+Shift (Mac OS), and drag a corner handle. When positioned over a corner handle, the pointer becomes a gray arrowhead.

image

Power Image–Part 2

After a lot of years developing software I’ve learned that the best result seldom happens the first time. There are those times when I’m just about done with a change and something happens and I lose it all. The computer bombs, I press the wrong button, something. I holler, swear and call myself names. Then I start over and rebuild it. And almost without exception I return a better product. The first time becomes the dry run, the practice run. I make my mistakes and figure out the details. Then when I do it the second time it falls together more smoothly.

What’s hard is when the mistake isn’t made and I have to push myself to throw away a perfectly good product and do it the second time. In the work place its not going to happen. The first attempt works and my boss isn’t going to take my argument that it will be just a bit better if I do it all over again. But I can with my art. It’s still hard to do it again, to convince myself that if I do it again it will be worth it. But it is.

The other thing that helps a lot is to live with it for a while and see what starts to bug me. Then do it again and fix those things.

And it’s always worth it. I get a better product and my skill set is stronger when I’m done.

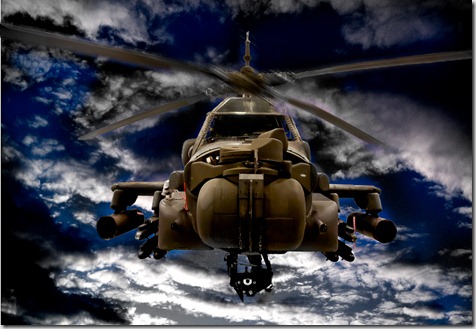
That’s what I did with the helo shot I posted a few days ago. It looked good, but I knew it could be better. So I went back, cleaned up the original cut-out and put the wheels back in – after researching and establishing this machine flies with the wheels down.

This time around I’ll include the pieces I used to build it.

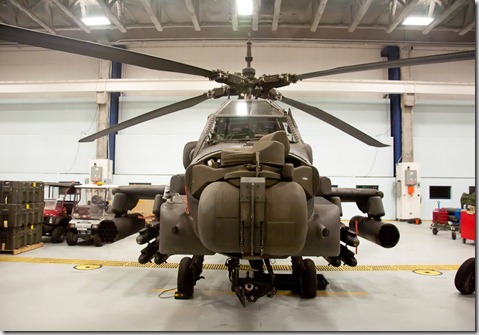
Here’s what I started with. This was shot in the hanger at the airport:

2011_0125_Apache_0014


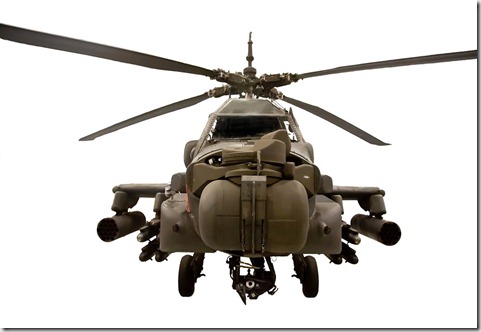
I cut the bird out and cleaned up some things:

2011_0125_Apache_0014-Edit


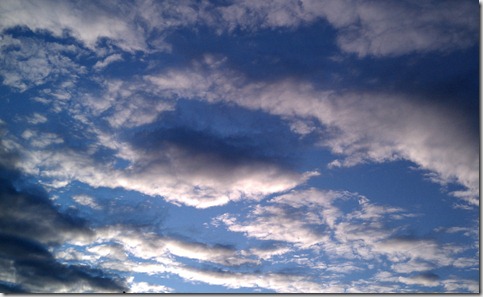
I dropped in a great sunset cloud shot I took with my phone last summer:

2010_0529_FromPhone_0023


Then I finished it:

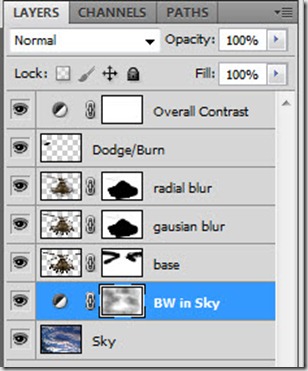
  • I copied the base image and dropped in a radial blur to add a sense of movement to the rotors. I adjusted the strength until I liked how it looked
  • I painted out the body on the layer mask.

The effect was good, but I wanted a bit more volume so I didn’t completely lose the rotors.

  • I copied the base image again and added a Gaussian blur. I adjusted it until I had the volume that felt right
  • I pulled over the same layer mask I used in the Radial blue layer.
  • Then I adjusted the opacity until it looked right
  • Next, I added the Dodge/Burn layer. I add a blank layer, set the blend mode to Overlay and paint with black to darken or white to lighten with the brush opacity set to around 20%. After each stroke I adjust the stroke using the Fade Brush Tool (Edit/Fade Brush Tool). I don’t use the Dodge/Burn tool, I feel like I have more control this way. On more complex images I’ll set up different layers for Darken and Lighten, but I combined them on this one.

The sky was too blue. I wanted it to be a bit more dramatic, less pretty.

  • I added a Black and White Adjustment layer to the sky layer and adjusted the Blue and Cyan sliders to adjust the contrast till I liked it.
  • Then I painted out the B&W affect on the layer mask using a grey brush to bring some color back in.
  • Then I added a Curves Adjustment layer to darken and increase the overall contrast.

Here’s the final layers panel:

helo_layers

And here’s the final image. Not dramatically different, but the little things make all the difference.

2011_0125_Apache_0014-Edit-Edit

A sense of perception

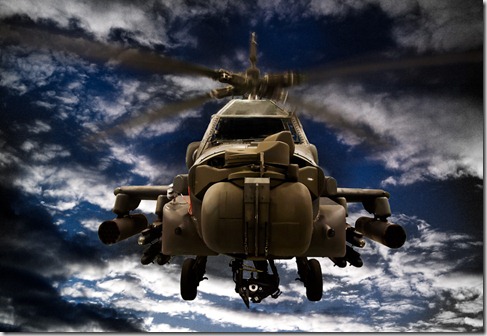
A couple of weeks ago we went to see the Apache Helicopters. I’ve always wanted to see one up close and personal. From pictures I’ve seen I’ve always had a sense of complete unbridled power! To me they represent the most naked physical form of pure power to me. That didn’t change when I saw them in person. Even more so.

We saw them in the hangers. I took some snapshots of my son checking them out. And I took a few profile shots. I pulled one of those profiles up to work on my selection/cut out skills. After I cut it out I started to play.

This is what I came up with:

2011_0125_Apache_0014-Edit2

This pretty effectively captures my perception of this machine.

A thought popped into my head as I was looking at this image.

I tend to wonder why people are so anti-USA. Intellectually I understand why, but I still wonder why they can’t see the good we try to do, the effort we put into building and helping. Then as I was looking at this I thought – this captures the representational vision many people have of the USA. The visual representation that pops into their head when they think of the USA.  Instead of the dove or the flag or the soldiers giving candy to kids they see this – a representation of the raw force that we wield to obtain our ends.  While I believe our ends to be positive, I suddenly perceived a sense of the fear we must engender to those who are not on our side of the gun. In this case – a very BIG gun.  Actually a LOT of very big guns. And I am very grateful that the nation that possesses such vast power tries to use it for altruistic ends. We don’t always succeed – in fact we fail quite often. But how much different it would be if the nation which possesses such vast, unbalanced power did so primarily for selfish ends.

Such is the power of a single image.

A couple of things from Permission to Suck

Here’s a couple of quotes from yesterday’s  ‘Permission to Suck’  post that hit home for me:

Using your instincts as a creative person means staying within yourself.

Make sure that every influence you’re connected to is filtered through your unique voice. Perhaps it’s best to keep it inside long enough to forget inspiration’s origin. Use the artifact of influence before it’s time and you’re work is a copy.

Without an original voice – without artistic instincts – you resemble a marketer. Producing what you think will sell; a trend chaser.

While copies are OK, they aren’t quality in the full sense of the word; they’re a lie as soon as you put your name on them. Influences, given time to incubate, are the nutrients of your unique voice. No matter how similar the final result, if you’re honest with yourself, don’t you instinctively know when they’re yours or a copy?

I know I do.

A Permission To Suck Manifesto law:

6. Your creativity is about your heart, not their surface. Creativity is your world view filtered through your talent. It’s your passion, experience, expertise, inspiration and your rules that drive you to create wonderful things that you’re destined to hate because they’re not good enough, and others are open to admire because they couldn’t do it.